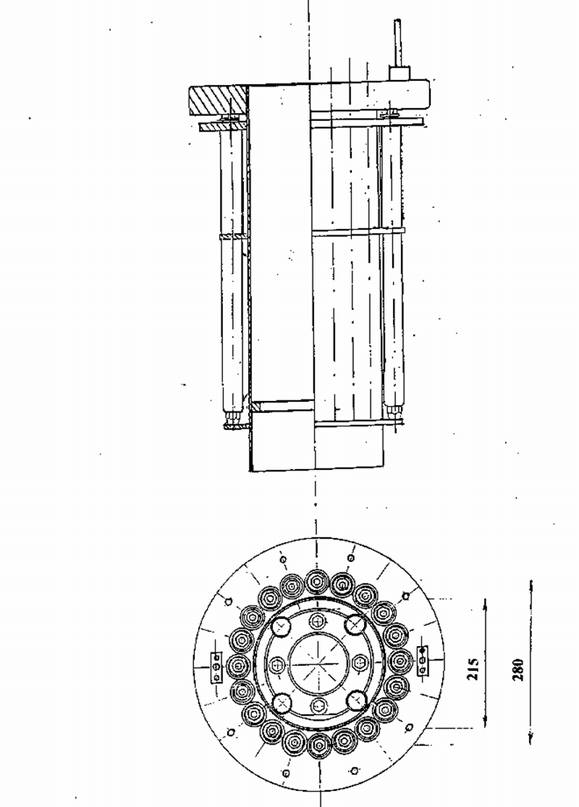
Fig. 2. The Cage and Co-60 Source Positions
Chapter 2/ page 6 of 10